
BlueStacks is compatible with Widows XP / Vista / 7 / 8 and MAC OSX
Once you download and install BlueStacks you can easily download apps from it or import them you'll need the .apk or other supported app files.
If you have an app file and want to import it into BlueStacks simply double click on it and it will automatically import itself and it will be saved in your BlueStacks player under MyApps.
I've been wanting to do this for a while now here's my top 3 free antivirus programs.
1.Avira Free Antivirus

Download - http://www.avira.com/en/index
Pros:
- Completely Free
- Light
- Fast
- Includes Anti-Spyware
- High Detection Rate
- Low Amount of False Dettections
- Regular Updates
Cons:
- No Firewall
2.AVG Free Antivirus
- Completely Free
- Good Scanning Speed
- Includes Anti-Spyware
- Low Amount of False Dettections
- Regular Updates
Cons:
- Not as light as the other two
- No Firewall
3.Avast Free Antivirus
Download - http://www.avast.com/en-eu/index
Pros:
- Completely Free
- Fast
- Includes Anti-Spyware
- High Detection Rate
- Regular Updates
Cons:
- No Firewall
- A Significant Number Of False Dettection
I'll share with you guys a little trick on how to save a lot of bandwith on your site.
Alright then let's get started.What's the thing that's the biggest in size on a website and you can't go without?
The images.Yes all the images in your background , headers , spacers etc.All of that.But what can we do?
Simple upload them somewhere else.But where?
I suggest you use http://tinypic.com/
Locate all the images on your site and simply replace the local links with the ones you get once you upload the images to tinypic.
Of course you can use another image hosting service but I strongly recommend using this one because Tinypic doesn't delete your images and it doesn't have a limit to how many times they would be viewed.

This is what the urls should look like.Keep in mind that you need to have http:// infront of the link.And it has to be the direct link to the image.To get the direct link simply right click on the image once you've uploaded it to tinypic and click Copy Image URL (for chrome) and something simmilar in Firefox and any other browser.
Do that to all the images you have on your site and bam you've saved a ton of bandwith.
I always get asked "Which card is better" and frankly it's all a matter of personal taste.
If you want to get a comparison between two Video Cards (ex. ATI and GeForce of the same class or a lower class vs a higher class video card) I'd suggest using http://www.gpureview.com/ .

This site has all you need from all the specs to user ratings.You can even see what overclocking does to the cards.
Just thought I'd share this.
Microsoft has lowered the price of the Surface Pro.
799$ for the 64GB version and 899$ for the 128GB version.
Here's some links.
Buy - http://www.microsoftstore.com/store/msusa/en_US/pdp/productID.275287300
Specs - http://www.microsoft.com/surface/en-us/surface-with-windows-8-pro/specifications

I keep getting asked this so I just decided to make a quick tutorial.
All you need to do is download http://en.garenatotal.com/index.php and install it.

This is what it looks like.Simply click on Warcraft hotkeys and set your desired hotkeys by clicking on the desired slot and then pressing the button that will be the hotkey to this slot.
It will automatically start Garena if you have it.If you don't want to use it with Garena just close the client and start your Warcraft.
If you want to use the Auto Join function just select a room , hover over it with your mouse and press F8.
If you want to try to join multiple rooms at the same time press F7 and select the rooms you want to try to join dragging down or up then pressing LMB (left mouse button).
Recently I decided to format my computer and reinstall XP.So everything was working fine until I tried to start Windows Update it gave me a " The website has encountered a problem and cannot display the page you are trying to view " error.
Turns out there's a really easy fix if you're on Windows XP sp2 just download:
http://download.windowsupdate.com/WindowsUpdate/redist/standalone/7.4.7600.226/WindowsUpdateAgent30-x86.exe
and install it.A reboot might be required.If you don't want to reboot you can try stopping the services you just updated yourself.
If you want to stop the services manually go to Run and type in net stop wuauserv then go to run again and type in net stop bits after you've done that go ahead and start up the services again net start wuauserv and net start bits.
Start your Windows Update again and it should be working fine.
http://www.passwordmeter.com/ is a great website to use if you need a good view on your passwords' strenght and where it needs to be improved.

I've been coming across this quite often lately and I figured out that for some reason when a video is embedded in another site there's never a problem with playback.So for example we'll use http://www.youtube.com/watch?v=Eh9XwSgCigc which is not loading for me.


Hope that helps!
You might be using blogger and wondering why your site doesn't get to the top results on google and other people's sites do.Well you're in luck in this tutorial I'll show you how to add a sitemap so google can crawl and index your pages faster and therefore rate your website higher.Let's get started.
First off you need a Google Webmaster Tools Account.You can get one by going to:
https://www.google.com/webmasters/
Once you're logged in select your blog and go to the Optimization tab then Sitemaps.If you're using Blogger there's a default sitemap at www.yoursite.blogspot.com/sitemap.xml otherwise you'd have to create your own.I might cover that in an upcoming tutorial but for now click ADD/TEST SITEMAP and put in sitemap.xml , test it just to make sure if it comes up with the number of posts you've made on your blog it's all working good.Go ahead an submit the sitemap.

I took a bit of a break these past few weeks but now I'm back to blogging.I decided to do this tutorial because I think it's useful and not many people know how to do it.So here's a way to get rid of the white background instead of using the magic wand tool.
Let's get started.So I googled a random pic of a cat and ended up with this guy.

Make sure your brush color is set to white or any other color the background may be.
Once that's done go up to Select then Color Range...

Click OK then the background around your object/s will be selected.Hit CTRL + X and you're done.If there's more white around the object do it over until you get the result you're looking for.

FileZilla is an Open Source FTP client for Windows , MAC OS X and GNU/Linux.You can download it at:
http://filezilla-project.org/

I'll be doing some tutorials on WordPress in the near future , as you can see I have it on my webserver.
To get a Random Post button on your blogger website first login to your blogger dashboard , then navigate to your blog , go to layout then add a gadget.Find HTML/JavaScript under Basic and click the plus sign next to it.Name it Random Post or whatever you want it doesn't matter because the name of the button is in the script itself this is just so you know what gadget it is.

<div id="myLuckyPost"></div> <script type="text/javascript"> function showLucky(root){ var feed = root.feed; var entries = feed.entry || []; var entry = feed.entry[0]; for (var j = 0; j < entry.link.length; ++j){if (entry.link[j].rel == 'alternate'){window.location = entry.link[j].href;}}} function fetchLuck(luck){ script = document.createElement('script'); script.src = '/feeds/posts/summary?start-index='+luck+'&max-results=1&alt=json-in-script&callback=showLucky'; script.type = 'text/javascript'; document.getElementsByTagName('head')[0].appendChild(script); } function feelingLucky(root){ var feed = root.feed; var total = parseInt(feed.openSearch$totalResults.$t,10); var luckyNumber = Math.floor(Math.random()*total);luckyNumber++; a = document.createElement('a'); a.href = '#random'; a.rel = luckyNumber; a.onclick = function(){fetchLuck(this.rel);}; a.innerHTML = 'View Random Post'; document.getElementById('myLuckyPost').appendChild(a); } </script> <script src="/feeds/posts/summary?max-results=0&alt=json-in-script&callback=feelingLucky"></script>
Paste this script in where it says content , save it and move it to wherever you want it to be on your blog.To change what the button says just replace View Random Post in the script I've made it bold so it's easier to find.
It's called TeamViewer and it's the best remote assistance software for non-commercial use.You can get it at http://www.teamviewer.com/
You can either install it or just run it for one session.It's small and compact and overall a great piece of software.It's also good for transferring multiple large files from one computer to another.

There's a Meeting option previously called Presentation where you can invite people to just look at what you're doing on your desktop without having any control unlike the remote assistance sessions.There's also live video , VOIP (Voice Over IP) , Conference Calls , Chat , File box and a Whiteboard function where you can point to stuff on your dektop via a paint brush , pencil , rectangle tool there's even speech balloons you can add for everyone to see and many more.And all that for free.

I know the site is a mess right now with random tutorials left and right but I'll get to categorizing it when it reaches 50 posts for now just use the Search bar to find the tutorials you're interested in.Stay tuned!

- Sign Up Required
- 50 GB Cloud Storage
- Up to 200MB per File
- Unlimited Fast Simultaneous Downloads
- Online Document Viewing & Editing
- File and Folder Sharing

2.http://www.4shared.com/
- Sign Up Required
- Storage Space 15GB
- Up to 2GB per File
- No Download Limit
- Password prottection
- Photo album

1.http://www.zippyshare.com/
- No Sign Up Required.
- Up to 200MB per File
- Unlimited Disk Space
- No Download Limit
- MP3 Preview Function
- Fast
First let's learn how to find alive proxy servers.Personally I like to use http://proxy-list.org/en/index.php because it's regularly updated.So pick a proxy and copy it.Now to go Tools then Options go to Advanced then Network then under Connection click Settings...
Go to Manual proxy configuration:

In this example we're using 1.1.1.1:1111 as our proxy.So you paste the part before the colon after HTTP Proxy: and the second part after Port: then click ok and we're done.
If the proxy server is dead the page won't load.If it's too slow just pick another one until you get one that works for you.Also most sites won't be fooled by Transparent proxies so you should get an Anonymous proxy or better usually the Elite proxies are pretty slow or down most of the time.
Alright now for how to make this a lot quicker and easier.Elite Proxy Switcher is a great addon for Firefox.You can download it at https://addons.mozilla.org/en-US/firefox/addon/elite-proxy-switcher/ it will basically shorten the process of switching proxies down to a few clicks.
A new bar should show up at the bottom of your browser just right click where it says direct connection and it will open up Connection Settings right away.Just type your proxy ip in and click ok.And there you go your proxy is active.If you want to quickly switch to your normal connection/ip just left click the bottom right of the bar it should be the IP of the proxy you are using and it will change back to your normal connection.

It's basically a tool that gives you a list of alive web based proxy servers.The ones that you access trough a website.You can get it at https://addons.mozilla.org/en-us/firefox/addon/proxylist/
Once you get it a new icon will appear on the top right of your browser right next to the search bar if you're using the default layout of Firefox.If you just click on it it will give you a list of alive Proxy Sites there's even a refresh function.

Here's a way to permanently fix the issue on Opera.

When you log on facebook instead of just approving the certificate go to the security tab and tick Remember my choice for this certificate.
Original post:
http://techspec.tk/2012/08/no-images-loading-on-facebook.html
I came across this problem a few days ago and some of my friends have been have too.
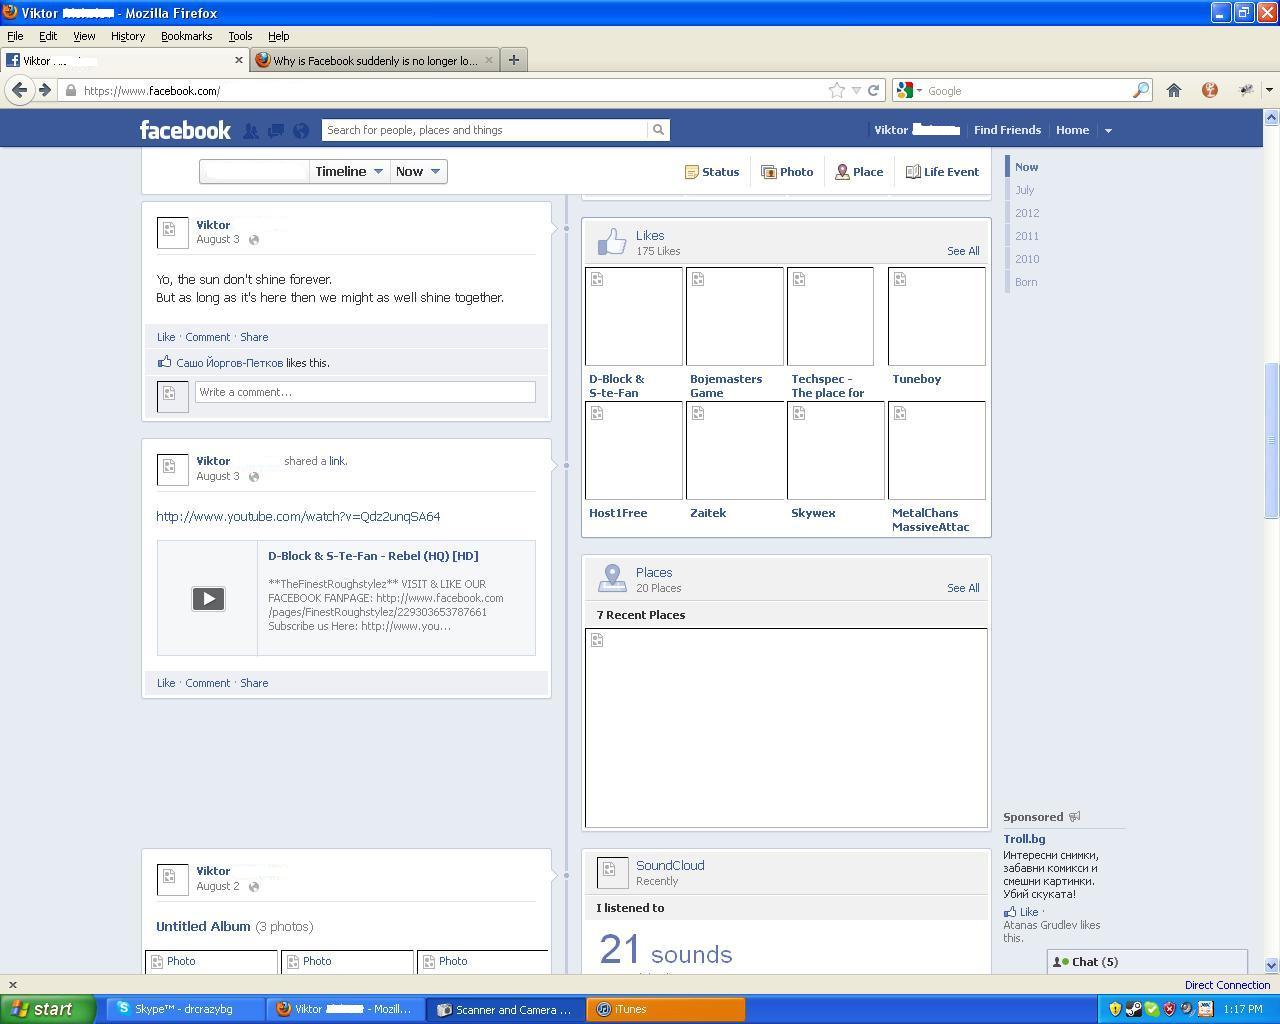

Just click approve every time it prompts you because facebook stores pictures on a lot of different servers.That's the fix i recommend because you'll have to go around and allow all facebooks' image servers manually on other browsers not like in opera with a few clicks.Although approving the servers on opera only lasts the session it just takes a few clicks.
Don't even bother trying to fix this on google chrome.You need to do everything manually and it only lasts the session.
For firefox find a blank image right click on it and View Image.

It's called i-FunBox and it's available on both MAC and Windows machines.It gives you full access to your Iphones' files , apps , pictures , videos etc.And best of all it's free and it works on Jailbroken and Non-Jailbroken Iphones.You can download it at http://www.i-funbox.com/
